
插件目录 / UI & Skins / dsh-quick-view
dsh-quick-view
已验证 · 实测可装 pengls
功能简介
dsh quick view plugin
可用 — 实测通过,早期项目
dsh quick view plugin 实测能干净安装、正常启动。早期项目,但功能可用。
「已验证」表示我们的自动化 CI 在干净 profile 里实际执行了 dsh plugin add 并启动成功——仅此而已。功能描述与版本兼容性均为作者声明。这不是安全审计,也不代表对第三方代码的背书。
README
dsh-quick-view
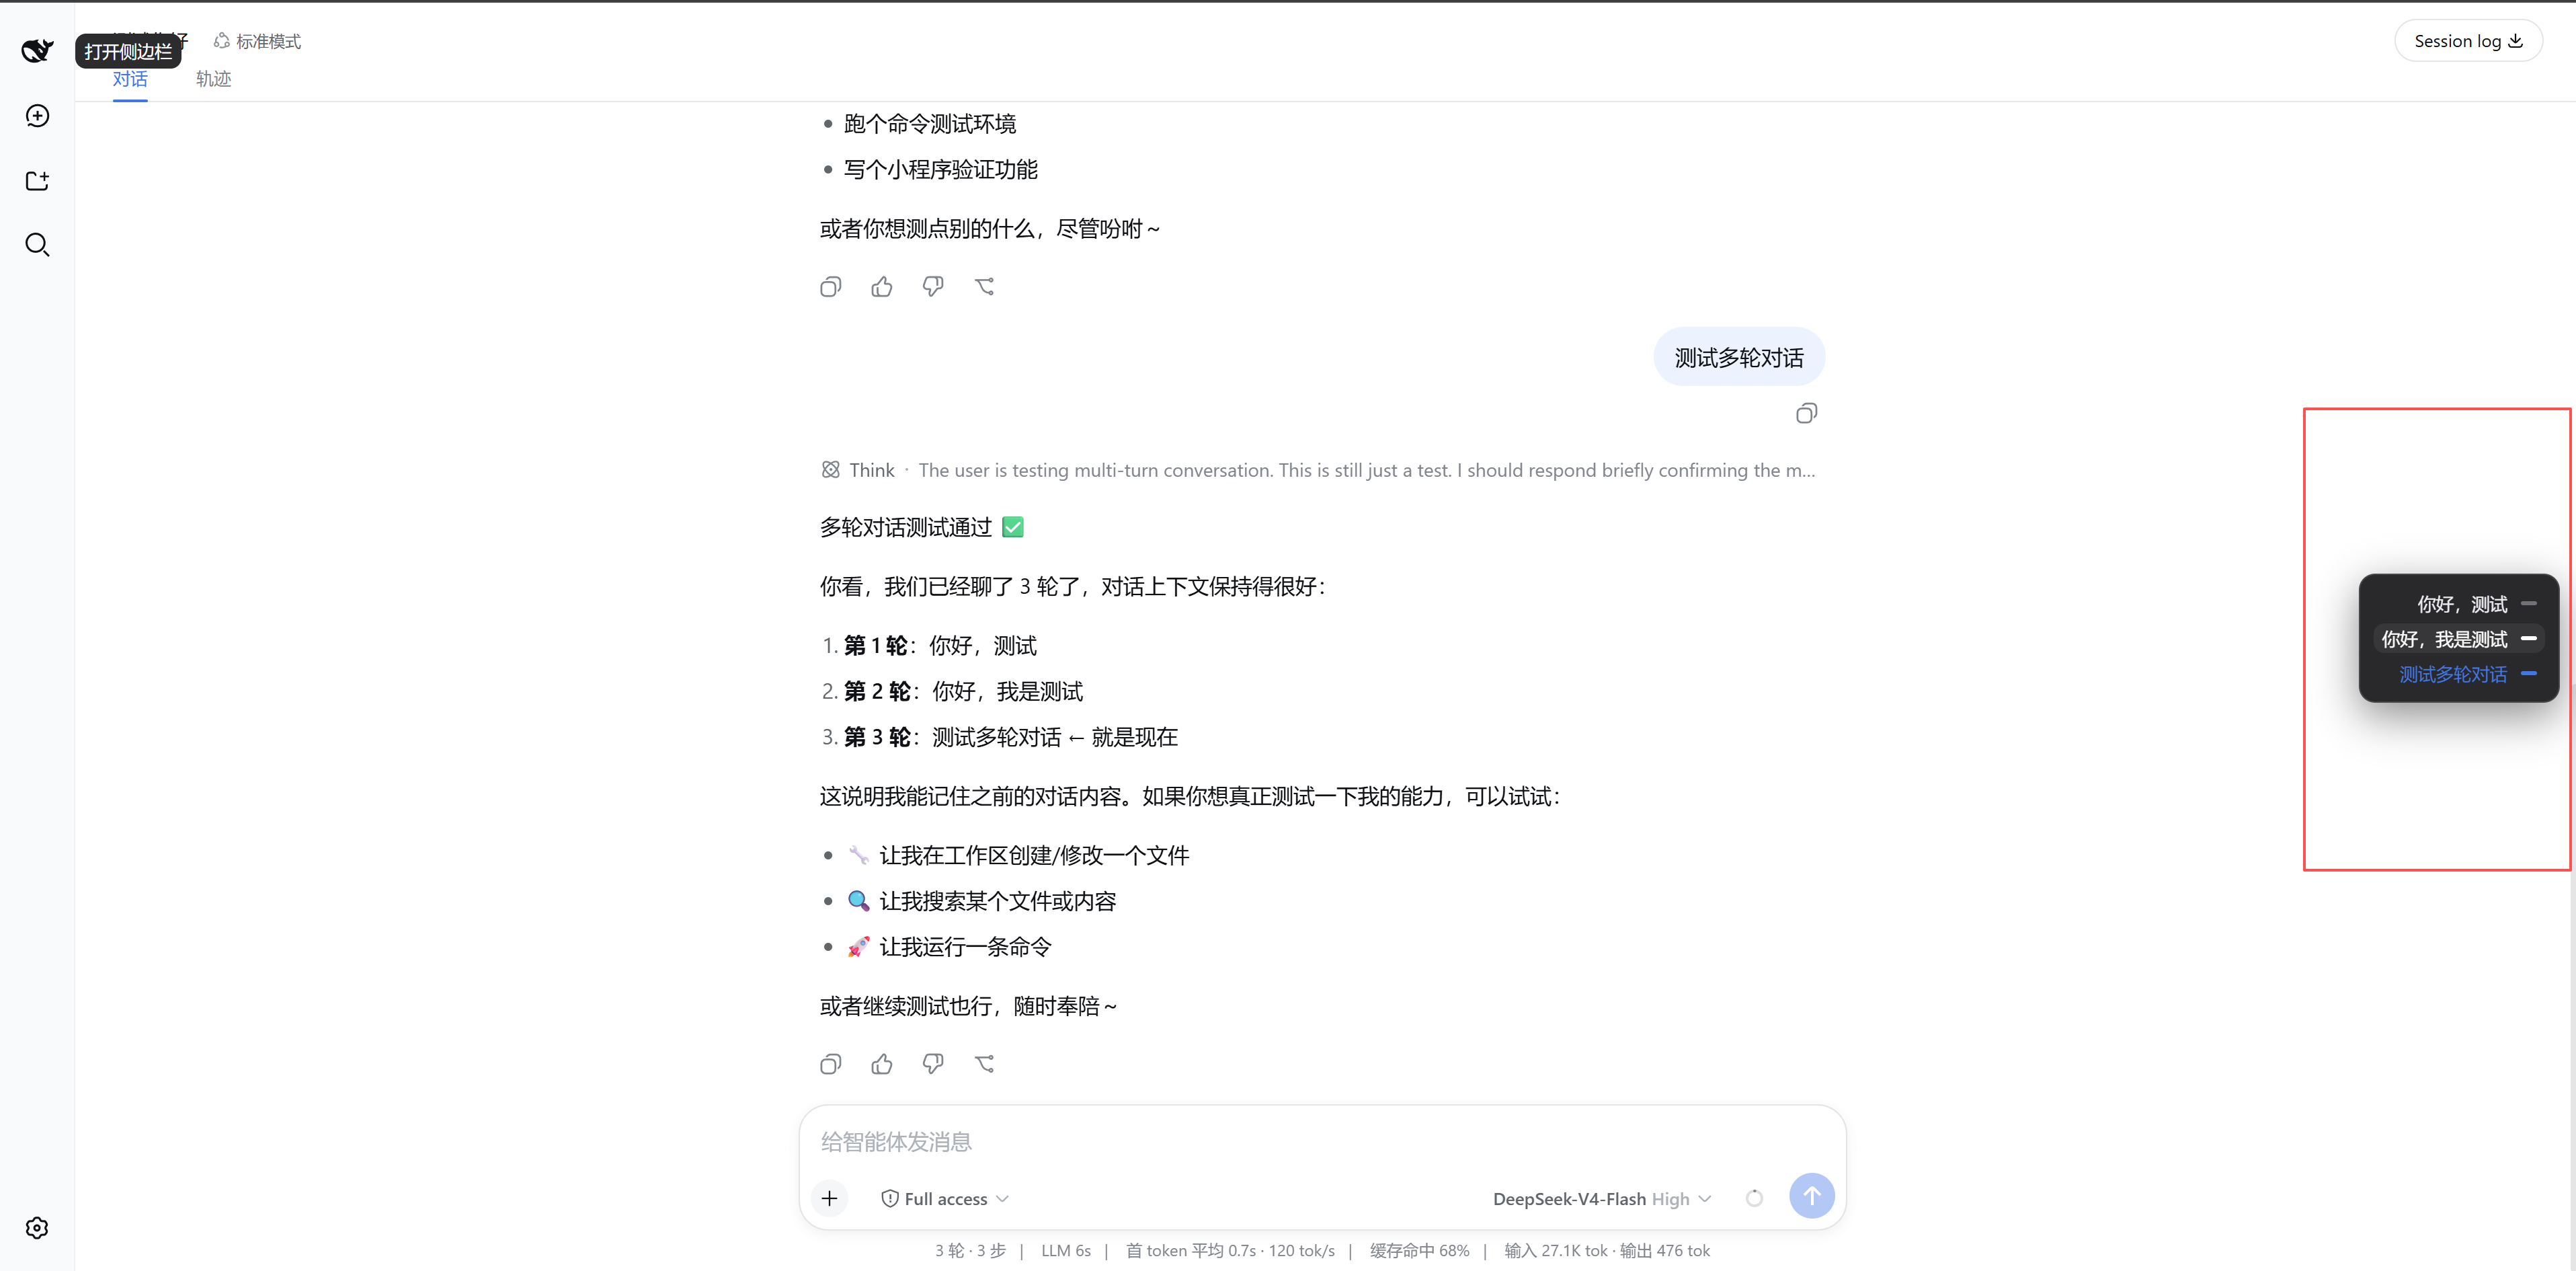
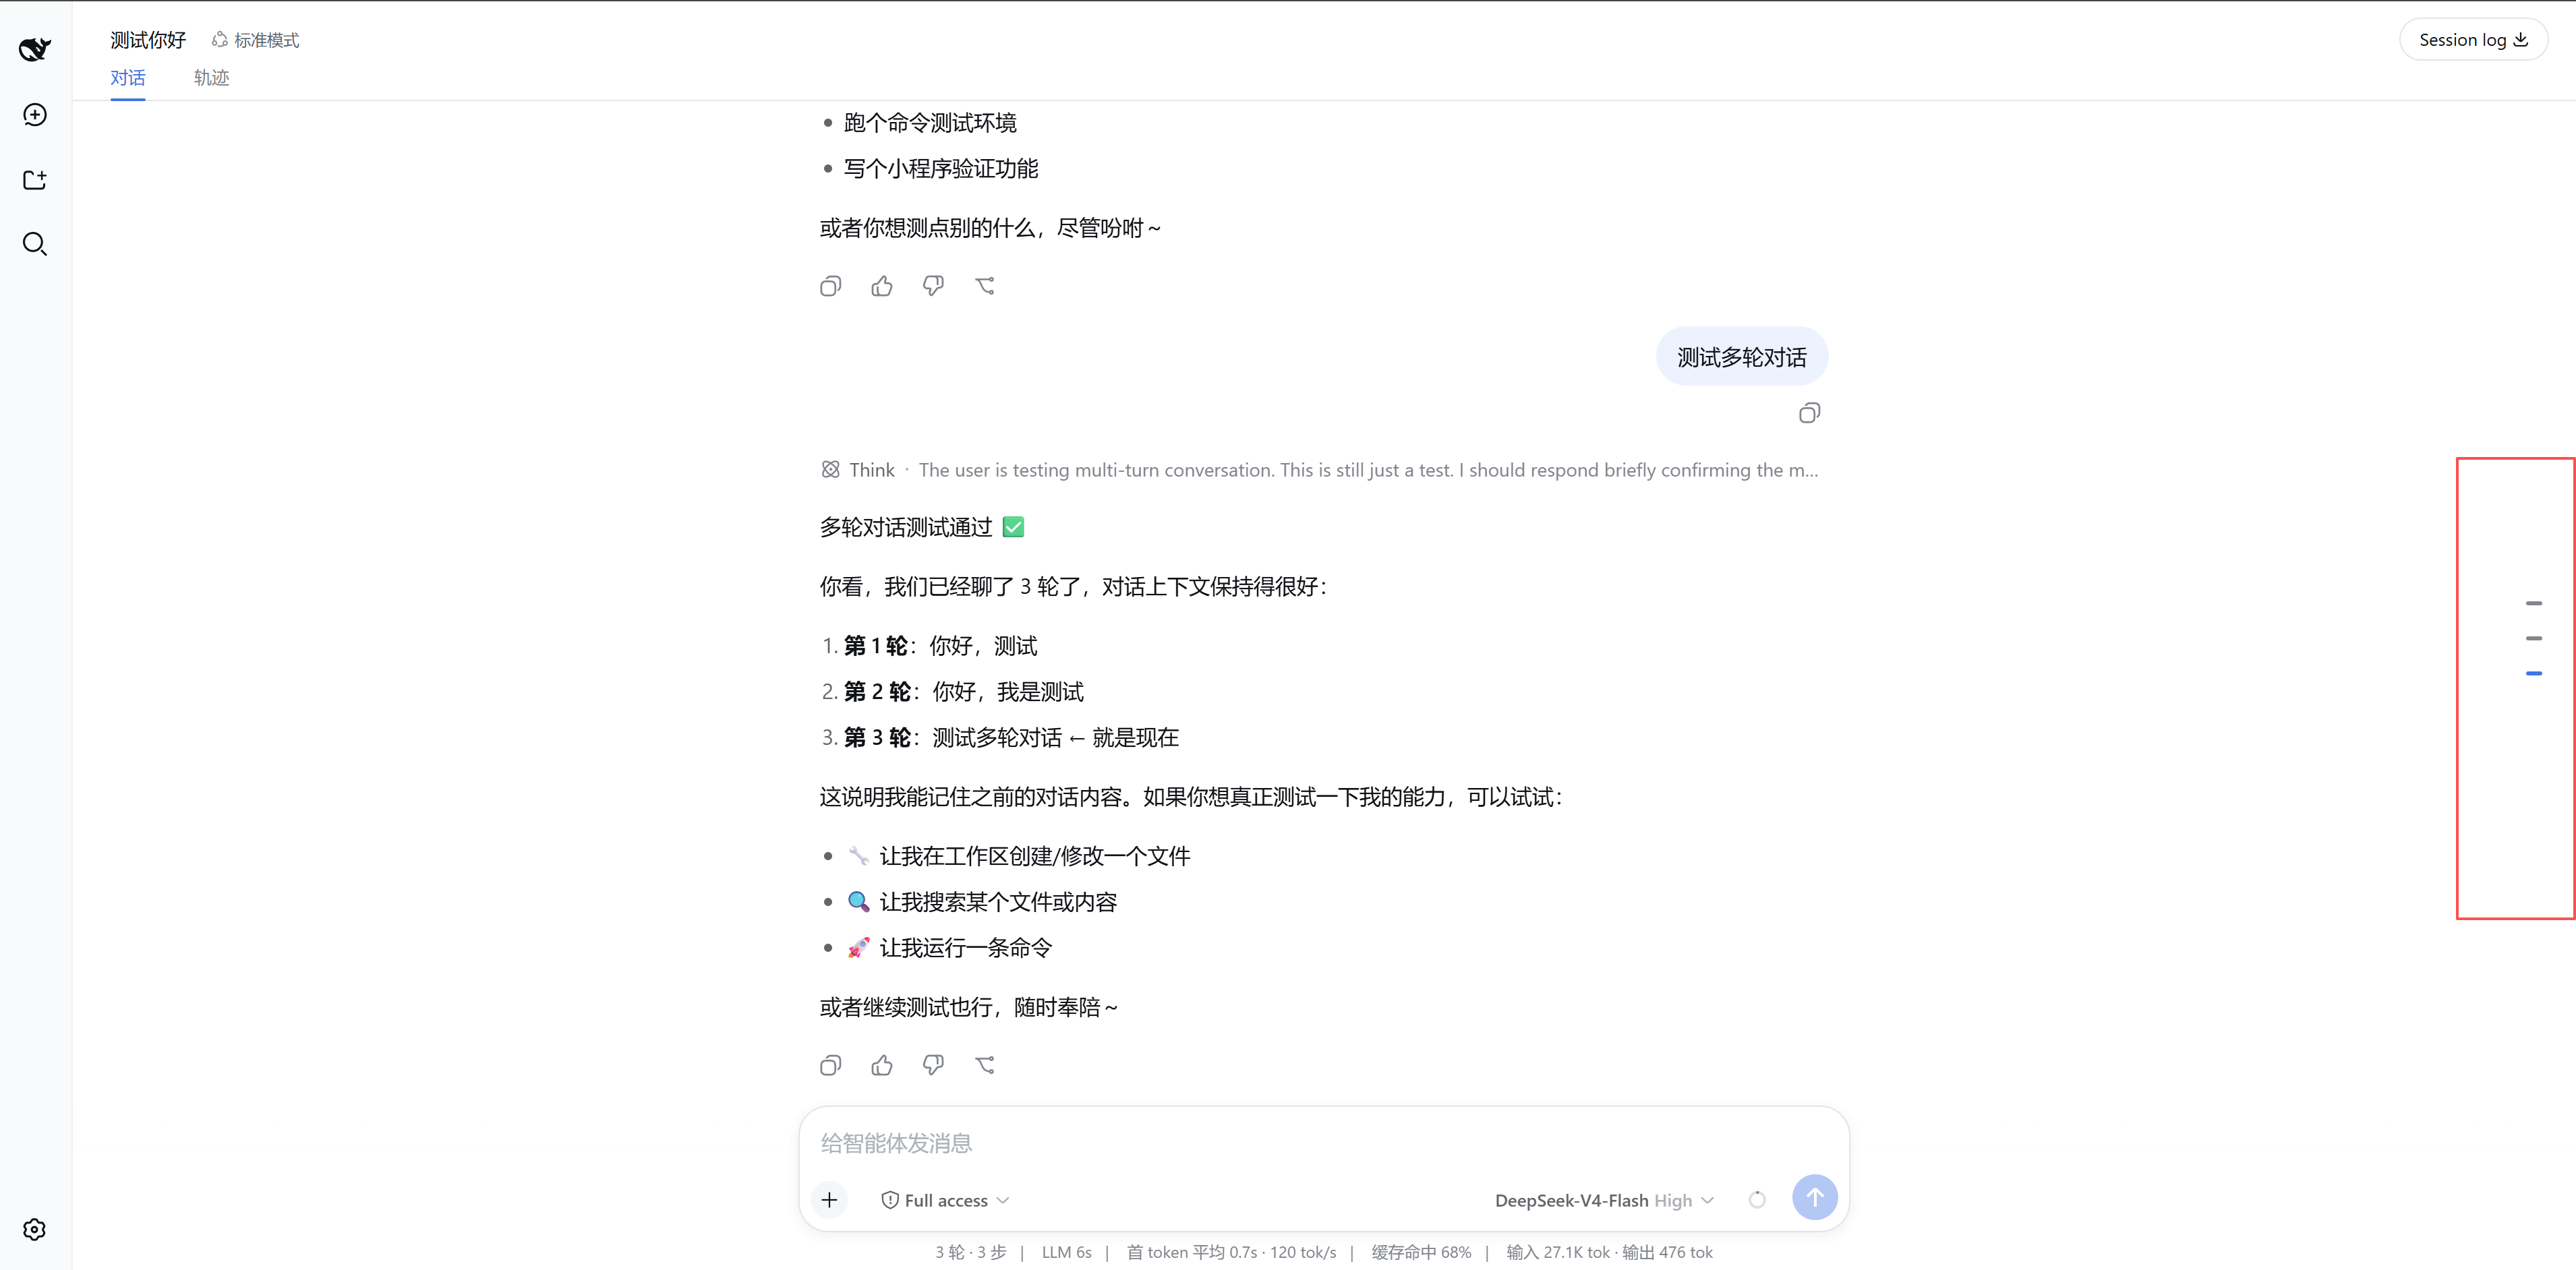
A dsh web client plugin that adds a floating right-side navigator to the conversation page. In a long session it is hard to find where you earlier asked something; this plugin lists every user input down the right edge and jumps the transcript to that message on click.
It is a browser-only (dsh.client) bundle — no host service, no tool, no prompt change. It registers into the conversation.session.header.utilities slot that the dsh web bundle already declares, so it composes into the shipped UI without any repo change.
Install
Two ways, mirroring other dsh plugins. Both need the dsh CLI on PATH.
1. From the npm registry (recommended — no clone or build step)
dsh plugin --profile web add @pengls/dsh-quick-view
The published tarball ships the prebuilt lib/, so pnpm installs it and dsh activates its patch layer — no prepare script runs.
2. From GitHub source
dsh plugin --profile web add github:pengls/dsh-quick-view
A git install fetches sources, which is fine here: this repo commits its built lib/, so a plain dsh plugin add github:pengls/dsh-quick-view needs no build step and hits no allowBuilds gate. Rebuild lib/ (npm run build) only when you edit src/.
Use
- Restart the profile:
dsh --profile web. - Open a session with at least two of your own inputs. A rail of short dashes appears on the right edge, vertically centered — one dash per user input, in conversation order (first at top). The last input's dash is selected (blue) by default.
- Hover the rail to expand a panel where each input becomes a
text + dashrow; click a row to scroll the transcript to that message and mark its dash selected.
How it works
cordis.patch.yml inserts one row mounting this package as a dsh.client plugin; package.json declares dsh.client (platform: 'web'), so the host's client-modules node half scans its ./client export into window.__DSH_BOOT__. The browser half (src/client/index.ts) registers a list occupant of conversation.session.header.utilities via ctx.slots.inject(...) — the safe cross-package registration that waits on ui-conversation's slot declaration.
QuickViewPanel.tsx reads only the framework session kit (useSession → conversation.chat.order/nodes) and builds the list. Clicking an entry uses the semantic anchor [data-chat-anchor-key] the chat view stamps, then scrolls its [data-conversation-scroll] scrollport — so it works across reflow and load-older pagination. No store, no business layer, no host round trip.
The browser half is built as an out-of-repo closure-factory bundle: scripts/build.mjs (esbuild) externalizes the shell baseline (react, react/jsx-runtime, @deepseek-ai/cordis, @deepseek-ai/dsh-client-ui-slots, @deepseek-ai/dsh-client-ui-primitives, @deepseek-ai/dsh-client-runtime/client) and wraps output in window.__ModuleLoader__.load({ id, factory: (require) => { … } }).
Development
npm install
npm run build                 # emits lib/index.js + lib/client.js
npm run typecheck             # validates src/ against the dsh type sources
tsconfig.json extends ../../deepseek-harness/tsconfig.base.client.json so @deepseek-ai/* resolves to real type sources; point extends at your dsh checkout if it lives elsewhere. The build itself uses esbuild and does not need the checkout.
Releasing a new version
Both install paths above resolve the same package, so every release means bumping, pushing, and publishing in one sweep:
# 1. Bump the version in package.json (semver: 0.1.1, 0.2.0, …)
# 2. Rebuild and commit lib/ (kept in git so GitHub installs need no build)
npm run build
git add -A
git commit -m "Release v<version>"
git push origin main
# 3. Publish to npm (prepack also rebuilds lib/)
npm publish --access public --registry https://registry.npmjs.org/
Notes:
- Publishing needs npm auth plus either an OTP (append
--otp <code>) or a granular access token with Bypass two-factor authentication enabled.--access publicis required because scoped packages default to private. - If your npm
registryis a read-only mirror (e.g. npmmirror), log in and publish againsthttps://registry.npmjs.org/explicitly, as above. lib/is generated; always rebuild before committing so the committed artifact matchessrc/.
Model Experience
This plugin adds no host prompt section, no tool schema, and no model-visible input. Its only effect is a client-side floating control; it does not change the session log or the model context.
安装
装一次目录插件,之后本站所有插件都能让 DeepSeek Harness 自动找、自动装:
dsh plugin add dshbase-catalog然后对 agent 说「帮我装 dsh-quick-view」,它会在目录里找到并自动安装。文档:dshbase-catalog · 已验证场景包。
该插件是 GitHub 源码(未发 npm)——直接从仓库装:
Web profile:
dsh plugin --profile web add github:pengls/dsh-quick-viewHeadless(CLI)profile:
dsh plugin --profile headless add github:pengls/dsh-quick-view实测报告
验证通过:从 GitHub 源码完成 L1 安装 + L2 加载 + L3 运行(dsh 0.1.0-rc.6)。
分享徽章
把这枚徽章粘进 README——它会链回本页,实测状态变化时自动更新:

[](https://dshbase.com/zh/plugins/dsh-quick-view/)<a href="https://dshbase.com/zh/plugins/dsh-quick-view/"><img src="https://dshbase.com/badges/dsh-quick-view.svg" alt="dshbase 实测可装"></a>